Explore & Configure Operators
After ensuring that you have all the necessary prerequisites in order, the next step is to explore and configure the operators. This guide will take you through the process, utilizing the Command Line Interface (CLI) tool to assist you in this endeavor. This step is a preliminary one that precedes the execution of operators.
Prerequisites
Before we start, let’s ensure you have everything you need for easy starting. If you haven’t already, install the accompanying CLI tool, detailed installation instructions can be found in the links below.
CLI Overview
The ads operator CLI tool is your trusty companion when working with operators. It simplifies the process, making it easy to explore the catalog of registered operators, gain insights into their specific use cases, and configure them to meet your needs. Additionally, this tool provides assistance in constructing Docker containers or setting up Conda environments to execute the operator, all while guiding you through the essential steps for running them.
Let’s start from the very beginning by calling the following command in your terminal to see a list of supported CLI commands:
ads operator --help
This command provides a concise overview of all available commands.
ads operator list: Retrieve a list of registered operators with this command.ads operator info: Obtain detailed information about a specific operator using this command. It offers comprehensive instructions on how to configure and run the operator across different environments and runtimes.ads operator init: Generate starter YAML configurations for an operator with this command.ads operator verify: Ensure the correctness of an operator’s YAML specification using this command.ads operator build-conda: Build a new Conda environment tailored to a particular operator using this command.ads operator publish-conda: Publish the operator’s Conda environment to the Object Storage bucket with this command.ads operator build-image: Create a new image customized for the operator using this command.ads operator publish-image: Publish the operator’s image to the container registry with this command.
Listing Operators
Begin by browsing our operator catalog to discover the pre-packaged solutions available for various data science tasks. The catalog provides short descriptions of each operator’s capabilities and use cases.
ads operator list

Getting an Operator’s Details
Each operator is accompanied by highly detailed instructions explaining how it can be configured and executed in various environments.
ads operator info --help

ads operator info --type <operator-type>
Initializing an Operator’s Configs
The init command is indeed crucial as it generates the foundational configurations tailored for a specific operator.
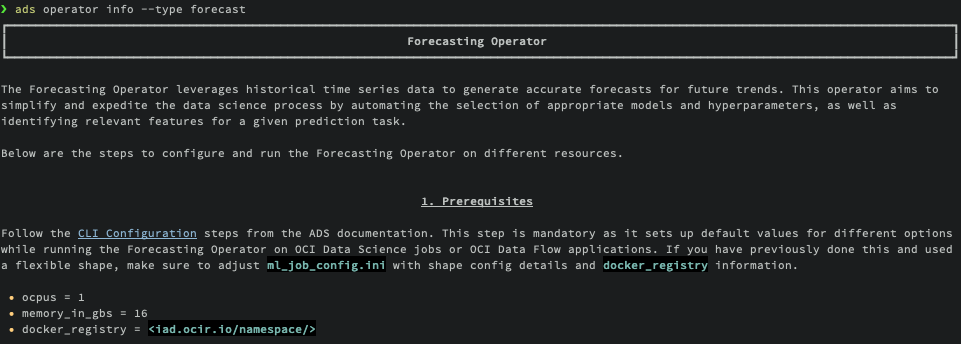
Before you start, make sure to complete the Configure Defaults step. This step is essential as it establishes default values for different options when running the operator on OCI Data Science jobs or OCI Data Flow applications. If you have already completed this setup and are using a flexible shape, remember to adjust the ml_job_config.ini and dataflow_config.ini files with the shape configuration details and docker_registry information.
ml_job_config.ini
ocpus = 1memory_in_gbs = 16docker_registry = <iad.ocir.io/namespace/>
dataflow_config.ini
driver_shape = VM.Standard.E4.Flexexecutor_shape = VM.Standard.E4.Flexdriver_shape_ocpus = 1executor_shape_ocpus = 1driver_shape_memory_in_gbs = 16executor_shape_memory_in_gbs = 16
Now let’s explore the init command.
ads operator init --help
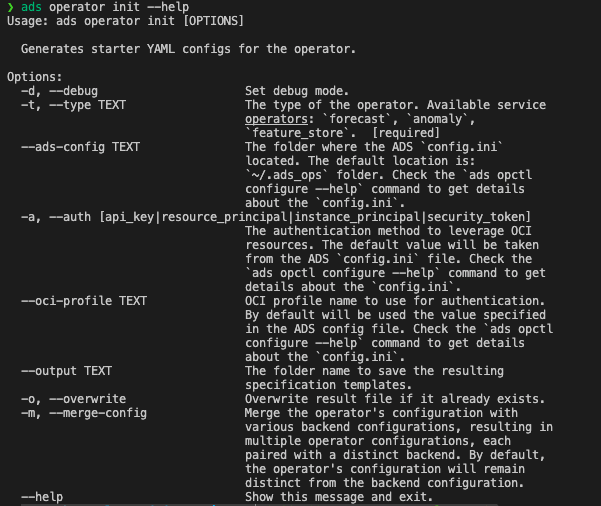
To set up your initial configuration files, execute the following command in your terminal:
ads operator init --type <operator-type> --overwrite --output ~/<operator-type>
By default, this command will generate separate configuration files for the operator and supported backends. This separation allows you to maintain a single configuration for the operator while having multiple configurations for different backend environments. This design enables running the same operator in various environments without altering the operator’s configuration.
The following flags are available for customization:
--overwrite: This flag is used to overwrite existing files in the~/<operator-type>/configfolder.--output: Use this flag to specify the output folder where the configuration files will be generated.--type: This flag is mandatory and is used to specify the operator type.
Upon executing the command, a list of configuration files will be created in the ~/<operator-type> folder.
If you need to merge the operator’s configuration file with the backend configuration files into a single configuration file, use the following command:
ads operator init --type <operator-type> --overwrite --output ~/<operator-type> --merge-config
This command will combine the operator and backend configurations into one cohesive file, simplifying running the operator with one configuration file.
The essential files generated include:
<operator-type>.yaml: Contains configuration related to particular operator. Will only be generated if
--merge-configflag is not used.<operator-type>_operator_local_python.yaml: This file includes local backend configuration for running operator in a local environment. You must manually set up the environment before executing the operator.
<operator-type>_local_container.yaml: This file contains local backend configuration for running operator within a local container. You should build the container before running the operator, following the instructions below.
<operator-type>_job_container.yaml: Contains Data Science job-related configuration for running operator in a container (BYOC) runtime. The container must be built and published before executing the operator, as detailed below. For comprehensive details about the supported configuration options, including the schema and available settings, please refer to the OCI Data Science Jobs documentation.
<operator-type>_job_python.yaml: Contains Data Science job-related configuration to run operator in a Data Science job within a conda runtime. The conda environment should be built and published before running the operator. For comprehensive details about the supported configuration options, including the schema and available settings, please refer to the OCI Data Science Jobs YAML Schema documentation.
b<operator-type>_dataflow_dataflow.yaml: Contains Data Flow application-related configuration to run operator in a Data Flow application. The conda environment should be built and published before running the operator. For comprehensive details about the supported configuration options, including the schema and available settings, please refer to the Data Flow Application YAML Schema documentation.
These generated configurations are designed to be ready for use without additional adjustments. However, they are provided as starter kit configurations that can be customized as needed.
The operator’s configuration file, named as <operator-type>.yaml, is generated based on the operator’s schema and contains the essential input attributes required to run the operator. These attributes serve as the bare minimum configuration for the operator to function.
However, in cases where the operator requires specific input or output sources of data, you may need to adjust the configuration manually to accommodate these requirements.
Beyond the basic input attributes, additional configurations within the YAML file are generated based on the information provided during the pre-step of configuring defaults, as detailed in the Configure Defaults documentation. These configurations are populated using environment variables as well, ensuring that the operator runs with the necessary settings and parameters.
In summary, while the core configuration is automatically generated from the operator’s schema, you have the flexibility to fine-tune and customize the configuration to match your specific data science needs.
Verifying an Operator’s Config
Before proceeding to run an operator, it’s essential to verify the operator’s configuration. Running an operator can be resource-intensive, so it’s a valuable step to ensure that the configuration is correct before initiating the operation. Once you have obtained the operator’s configuration (specification) in YAML format, you can use the following command to verify it:
ads operator verify --help
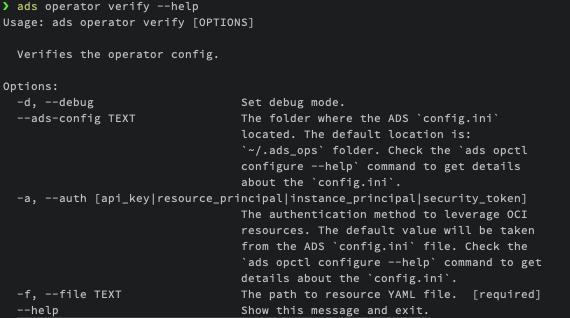
The configuration file can be located in an Object Storage bucket or in a local repository. To specify the authentication type, use the --auth attribute.
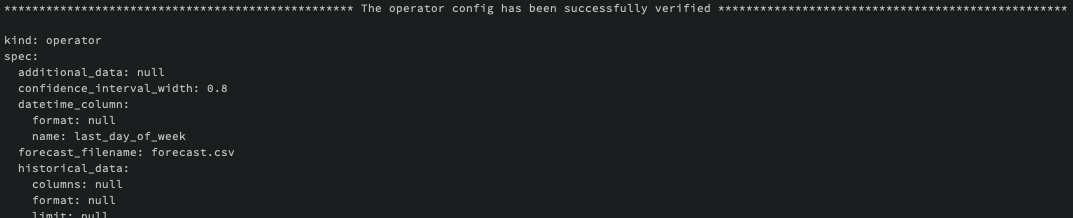
Verification helps you catch any errors or inconsistencies in the operator’s configuration, ensuring that it will run smoothly and produce the desired results when executed.
ads operator verify -f ~/<operator-type>/<operator-config>.yaml
Building an Operator’s Image
In order to run an operator within a local container or utilize it with the OCI Data Science Jobs service’s BYOC (Bring Your Own Container) runtime, you must first create a dedicated container image for the specific operator. This process is straightforward and only requires that you have the Docker CLI installed on your local machine. Below, we outline the steps to build your custom container.
ads operator build-image --help
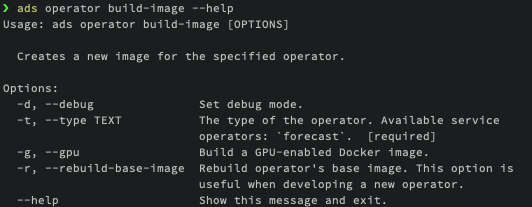
The fundamental attribute you need to provide is --type, which represents the name of the operator. The operator’s name and version will be automatically used as the image name and tag.
ads operator build-image --type <operator-type>
An interesting point to note is that the operator’s container can be built to accommodate both CPU and GPU architectures, although this capability depends on the specific operator’s requirements.
Once the operator’s image is successfully built, you have the option to publish it to the Oracle Container Registry. This publishing step becomes necessary when you intend to run the operator on the OCI Data Science Jobs service within the BYOC runtime.
Publishing an Operator’s Image
After successfully building the operator’s image, the next step is to publish it to the Oracle Container Registry. As mentioned previously, publishing the image is specifically required when you intend to run the operator on the OCI Data Science Jobs service within the BYOC runtime. Fortunately, this step is quite straightforward. Below, you’ll find instructions on how to publish the image to the Container Registry.
ads operator publish-image --help
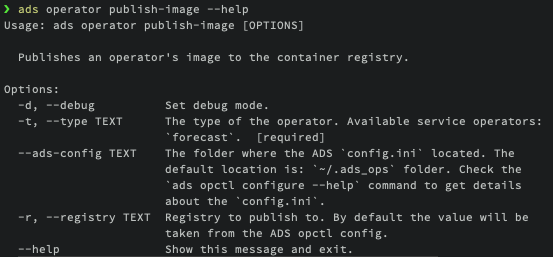
The only mandatory parameter for this command is the operator type that you wish to publish.
ads operator publish-image --type <operator-type>
While the image name is the only required parameter, you also have the option to provide the registry parameter if needed. By default, the information about the registry where the container should be published is retrieved from the ADS config generated during the Configure Defaults step.
For more detailed information on publishing containers, you can refer to the Oracle Container Registry documentation.
Building an Operator’s Conda Environment
Another option for running an operator on OCI resources is to utilize a Conda environment. Building an operator’s Conda environment is necessary if you intend to run the operator on the OCI Data Science Jobs service within the Conda runtime or on the Data Flow service. Additionally, the Conda environment can be employed within a Data Science Notebook Session to execute a specific operator.
To build the operator’s Conda environment, follow these steps:
ads operator build-conda --help
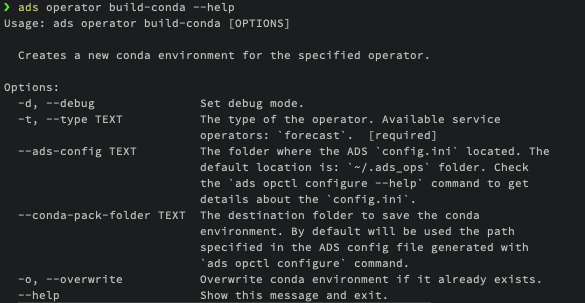
The only mandatory parameter for this command is the --type of the operator. However, you also have the option to specify the destination folder for the Conda environment. By default, the information about the destination folder where the Conda environment should be created is retrieved from the ADS config generated during the Configure Defaults step.
ads operator build-conda --type <operator-type>
Once you have successfully built the Conda environment, you will need to publish it to OCI Object Storage. This step allows the OCI Data Science Jobs and Data Flow services to utilize the Conda environment seamlessly.
Publishing an Operator’s Conda Environment
To make a locally built Conda environment available in the OCI Object Storage bucket, follow these simple steps:
ads operator publish-conda --help
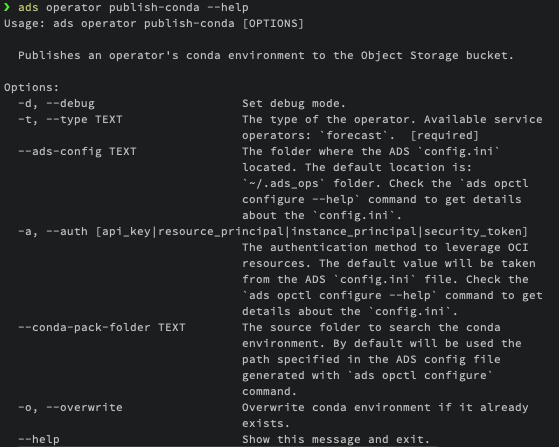
For instance, if you have constructed a Conda environment for the specific operator, the command would appear as follows:
ads operator publish-conda -t <operator-type>
Publishing the Conda environment to OCI Object Storage enables the OCI Data Science Jobs and Data Flow services to access and utilize this environment efficiently. This step is essential to ensure that your operators run seamlessly within the OCI ecosystem.